
How to Manage Office 365 Distribution Groups as Group Owner
If you have been assigned as a group owner, you can manage group membership through the Exchange Admin Portal (click here to open in a new tab).
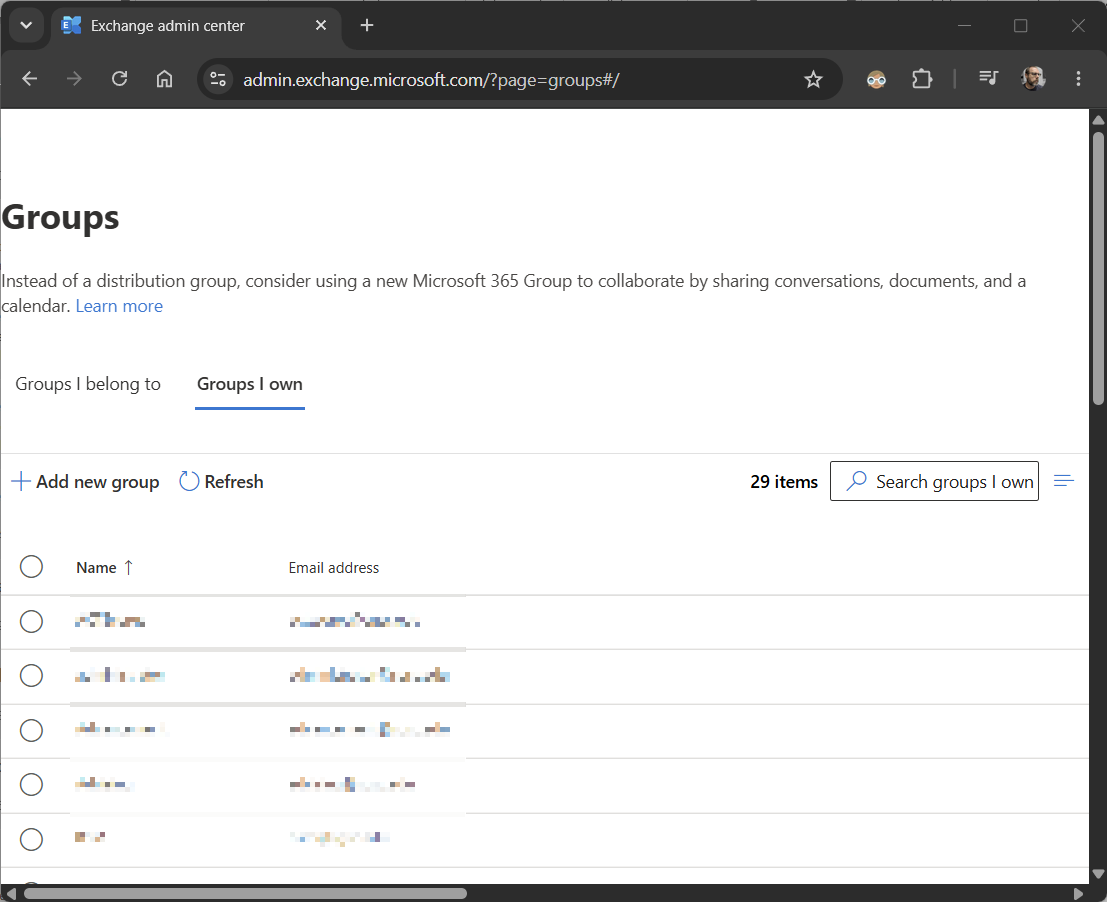
Log in with your work account, then navigate to the "Groups I own" tab:
To add or remove members to a particular group, select the group from the list and a flyout should open. Select the Members tab:
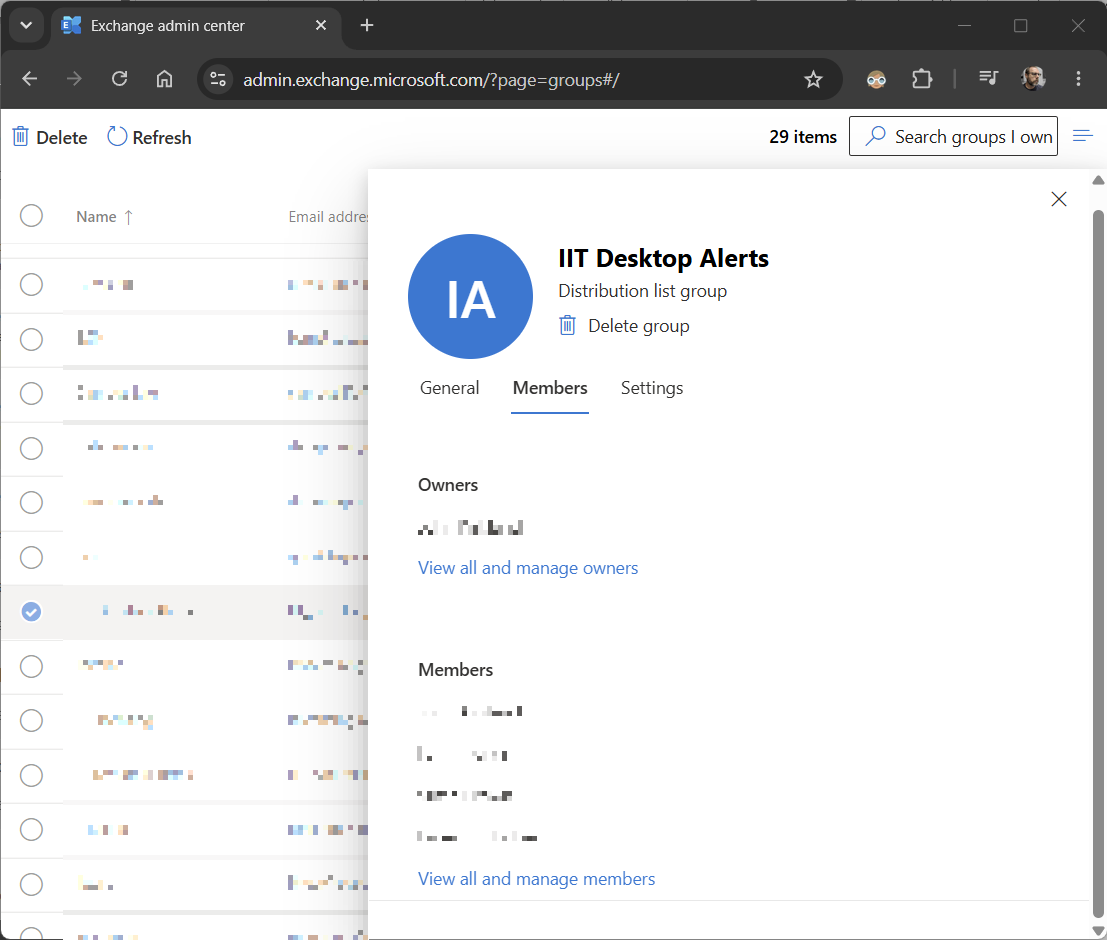
Click the link at the bottom to "View all and manage members":
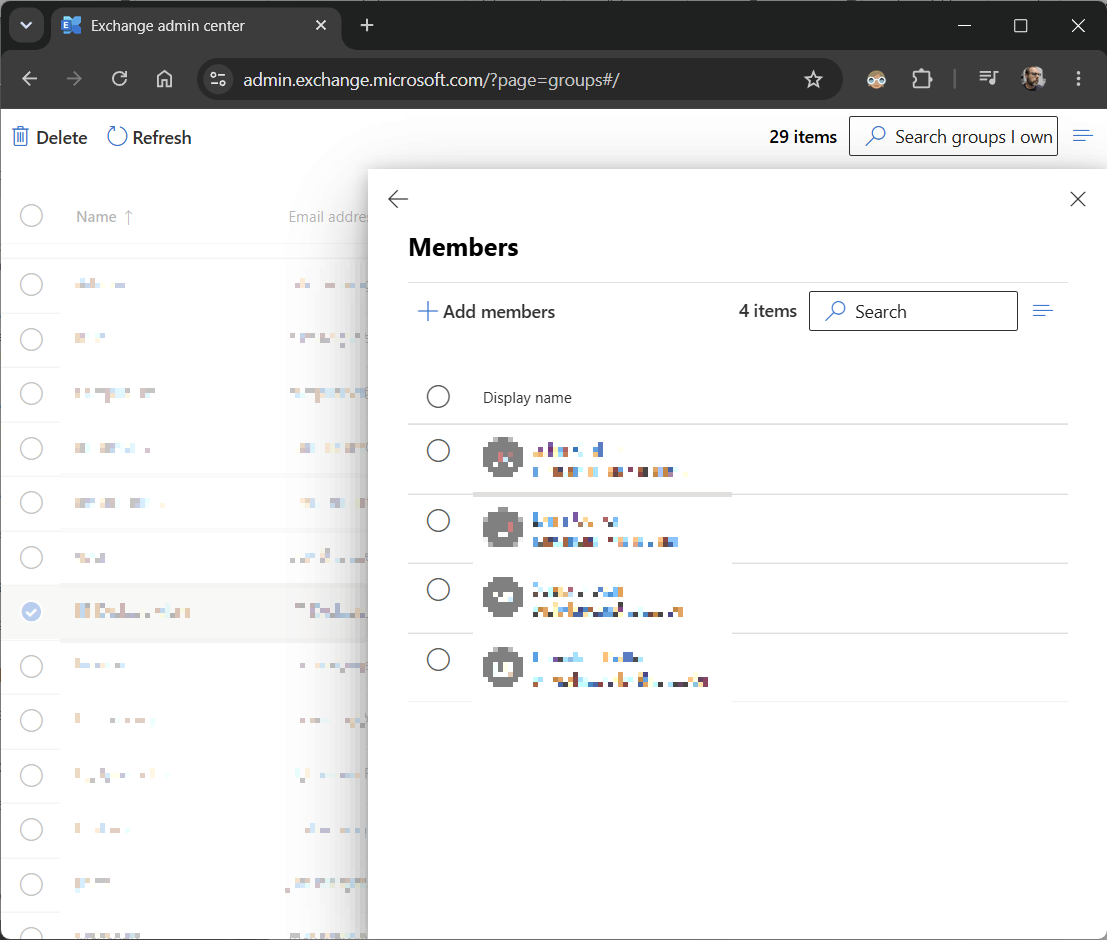
To add a new member, click the "Add members" link, search for the name and select it, then click Add.
To remove a member, select them from the list and the "Add members" link will change to "Delete". Click Delete.
If you experience any issues accessing your groups, or need additional assistance with managing your groups, submit an IT ticket.
Troubleshooting
If you can't see any groups listed in the "Groups I own" page, the Role assignment policy may not be set correctly in the Exchange Admin center. The IT department will need to change the Role assignment policy to "Office 365 Group Creators" in the Exchange Admin Center under the Mailbox tab of the account.